安裝Git
讓我們開始使用Git。 首先讀者要做的事是安裝Git。 讀者有很多取得它們的方法。 主要的兩種分別是從原始碼安裝或者從讀者使用平台現存的套件安裝。
從原始碼安裝
若讀者有能力的話,從原始碼安裝是非常有用的。 因為讀者能取得最新版本。 每一版Git通常都會包含有用的UI改善。 因此取得最新版本通常是最好的,只要讀者覺得編譯軟體的原始碼是很容易的。 許多Linux發行套件通常都是附上非常舊的套件。 除非讀者使用的發行套件非常新或者使用向後相容的移植版本。 從原始碼安裝通常是最好的選擇。
要安裝Git,讀者需要先安裝它需要的程式庫:curl、zlib、openssl、expat及libiconv。 例如:若讀者的系統有yum(如:Fedpra)或apt-get(如:以Debian為基礎的系統),讀者可使用下列任一命令安裝所有需要的程式庫:
$ yum install curl-devel expat-devel gettext-devel \
  openssl-devel zlib-devel

$ apt-get install libcurl4-gnutls-dev libexpat1-dev gettext \
  libz-dev libssl-dev
當讀者安裝所有必要的程式庫,讀者可到Git的網站取得最新版本:
http://git-scm.com/download接著,編譯及安裝:
$ tar -zxf git-1.7.2.2.tar.gz
$ cd git-1.7.2.2
$ make prefix=/usr/local all
$ sudo make prefix=/usr/local install
在這些工作完成後,讀者也可以使用Git取得Git的更新版:
$ git clone git://git.kernel.org/pub/scm/git/git.git在Linux系統安裝
若讀者想使用二進位安裝程式安裝Git到Linux,一般來說讀者可經由發行套件提供的套件管理工具完成此工作。 若讀者使用Fedora,可使用yum:
$ yum install git-core若讀者在以Debian為基礎的發行套件,如:Ubuntu。 試試apt-get:
$ apt-get install git在Mac系統安裝
有兩種很容易將Git安裝到Mac的方法。 最簡單的是使用圖形化界面的Git安裝程式,可從SourceForge下載)圖1-7):
http://sourceforge.net/projects/git-osx-installer/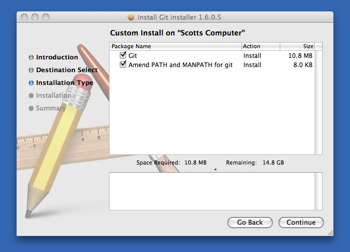 圖1-7. Git OS X 安裝程式。
藉由MacPorts安裝Git是另一種主要的方法。 若讀者已安裝MacPorts,使用下列命令安裝Git
$ sudo port install git-core +svn +doc +bash_completion +gitweb讀者完全不需要安裝所有的額外套件,但讀者可能會想要加上+svn參數,以利於使用Git讀寫Subversion儲存庫(參考第8章)。
在Windows系統安裝
在Windows系統安裝Git相當地容易。 msysGit專案已提供相當容易安裝的程序。 只要從GitHub網頁下載安裝程式並執行即可:
http://msysgit.github.com/在安裝完畢後,讀者同時會有命令列版本(包含SSH客戶端程式)及標準的圖形界面版本。
Note on Windows usage: you should use Git with the provided msysGit shell (Unix style), it allows to use the complex lines of command given in this book. If you need, for some reason, to use the native Windows shell / command line console, you have to use double quotes instead of simple quotes (for parameters with spaces in them) and you must quote the parameters ending with the circumflex accent (^) if they are last on the line, as it is a continuation symbol in Windows.